String Painting
String painting is such a great art idea for both adults and kids. You don’t need any special skills or equipment and it’s really easy to create really cool looking paintings! All three of my kids really enjoyed this project. My kids LOVED seeing the art that their string designs made. And so did I! I’ve included lots of photos in the post below so you can see what worked for us… and what sort of flopped!
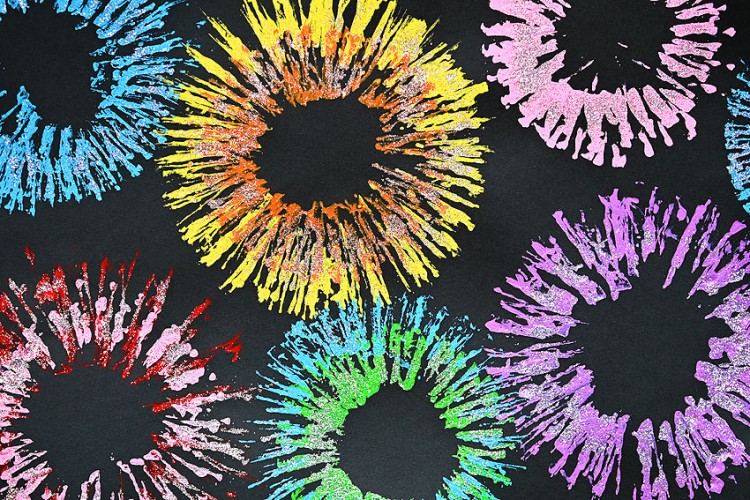
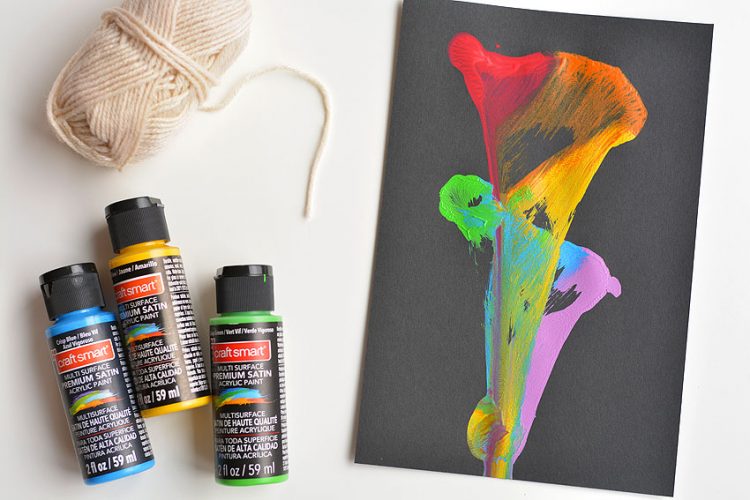
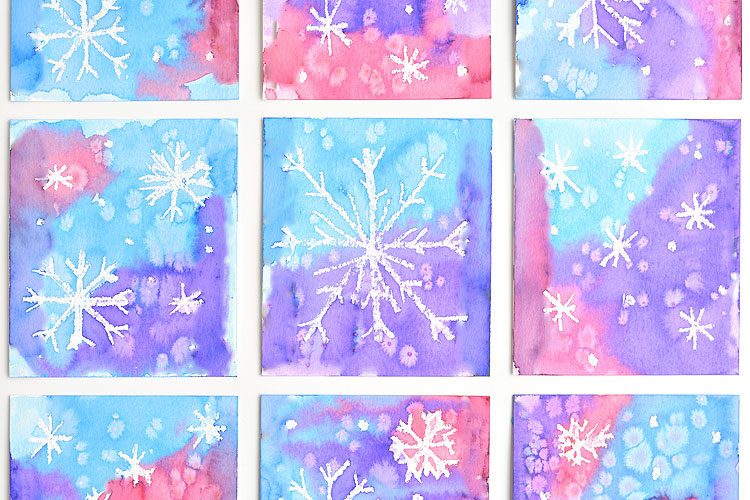
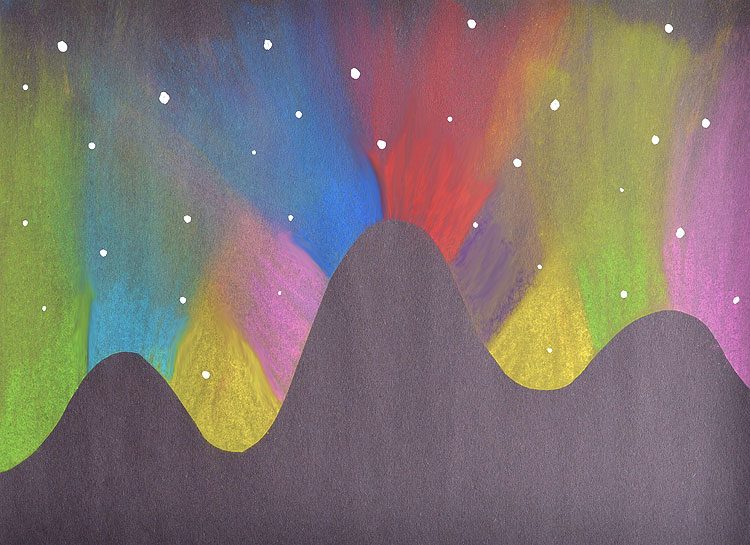
We used printer paper in the photos you’ll see in this post. If you want to turn your creations into greeting cards, or art that will last a little longer then I recommend using a stronger paper like cardstock or watercolour paper. Paper Roll Fireworks Painting String Paint Art with Acrylic Paint Magic Salt and Watercolor Snowflake Art Northern Lights Chalk Art
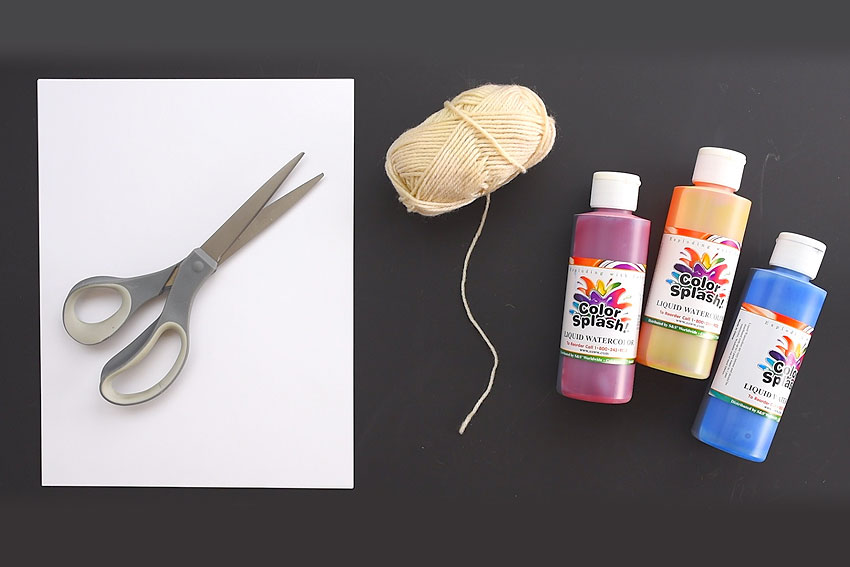
White printer paper (or card stock or watercolor paper) Acrylic yarn (or cotton yarn) Liquid watercolor paint (or ink)
We used regular acrylic yarn for all the paintings you’ll see below. We also tried cotton yarn and it worked really well too.
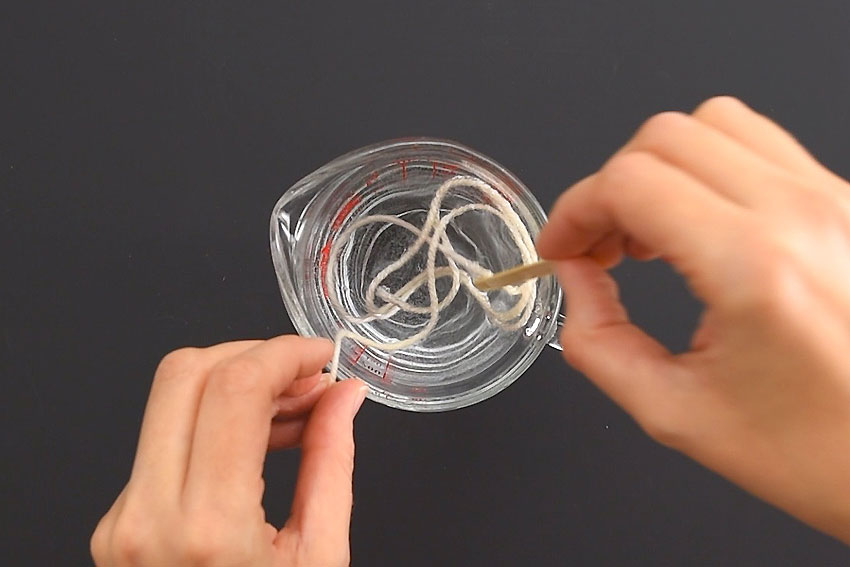
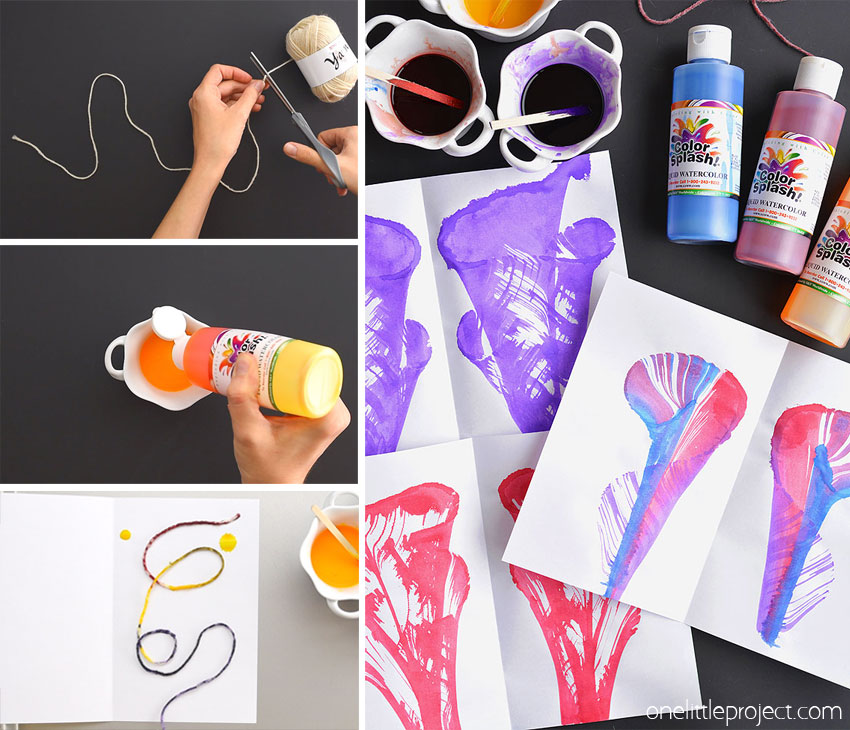
Cut a piece of yarn that’s about 18 to 24 inches long. The shorter your piece of yarn is, the easier it is to work with.
Optional: I found the yarn absorbed the watercolor paint better when it was soaked in water first. It doesn’t need to soak for long. A couple minutes while you’re preparing everything else will do the trick.
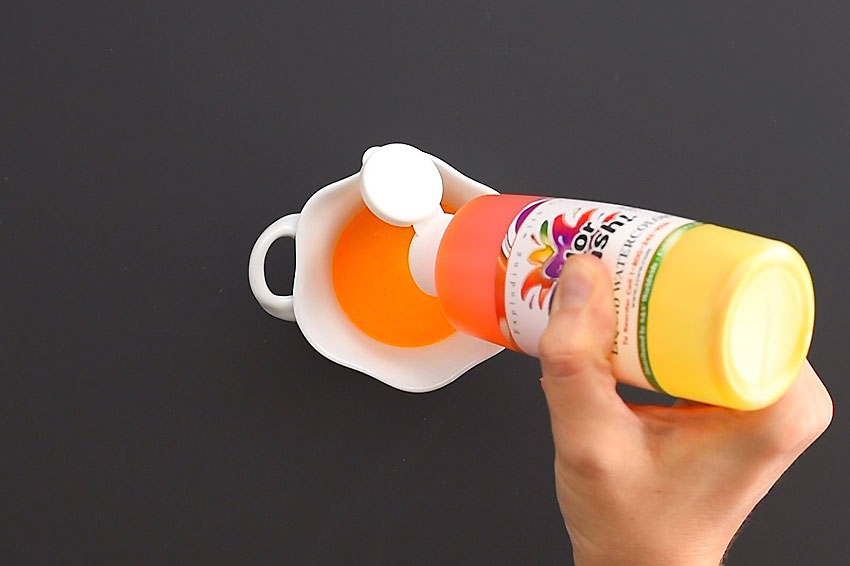
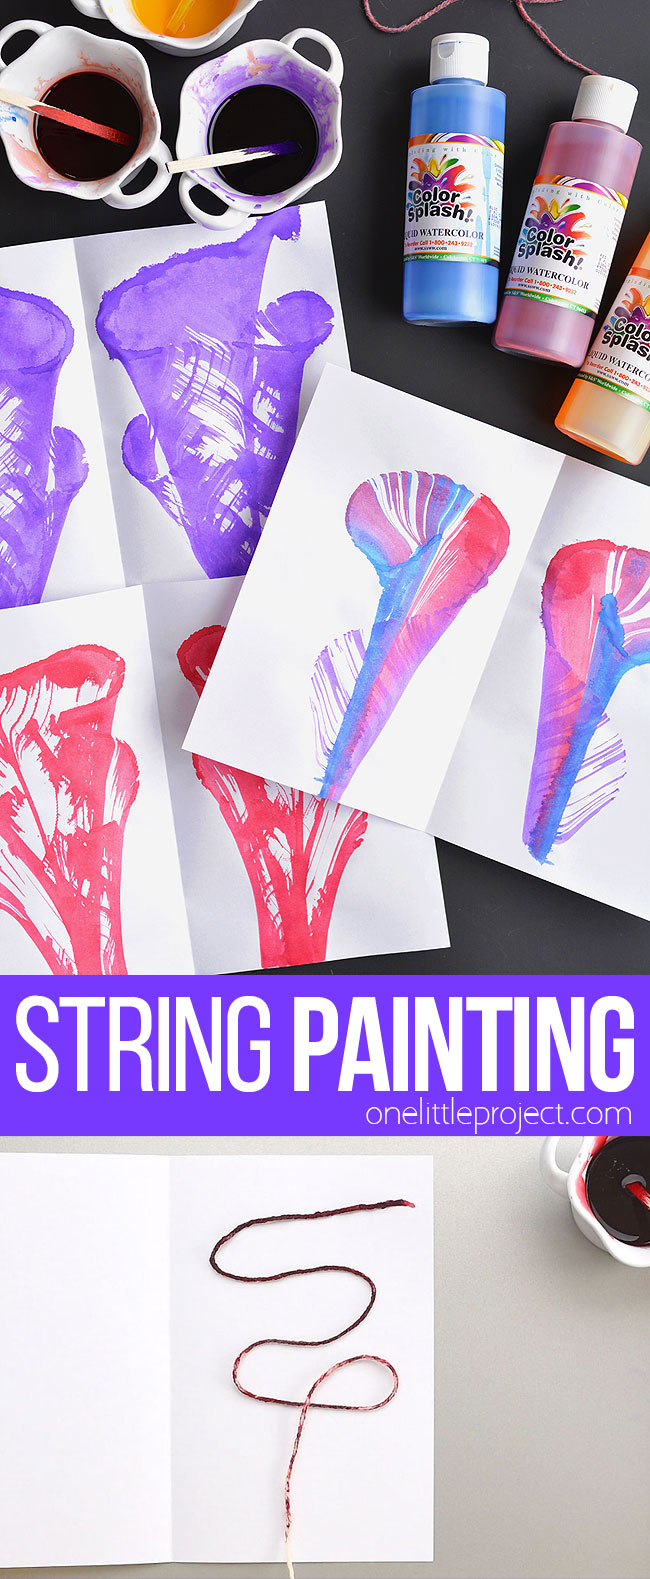
Pour the liquid watercolor paint into a small bowl. You’ll need the bowl to have at least 1/4 inch of paint in the bottom of it.
Dip the String
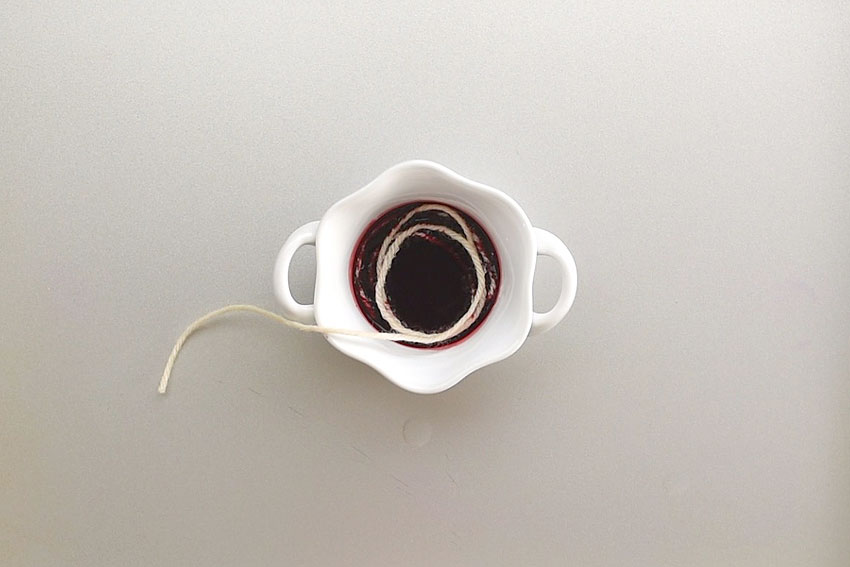
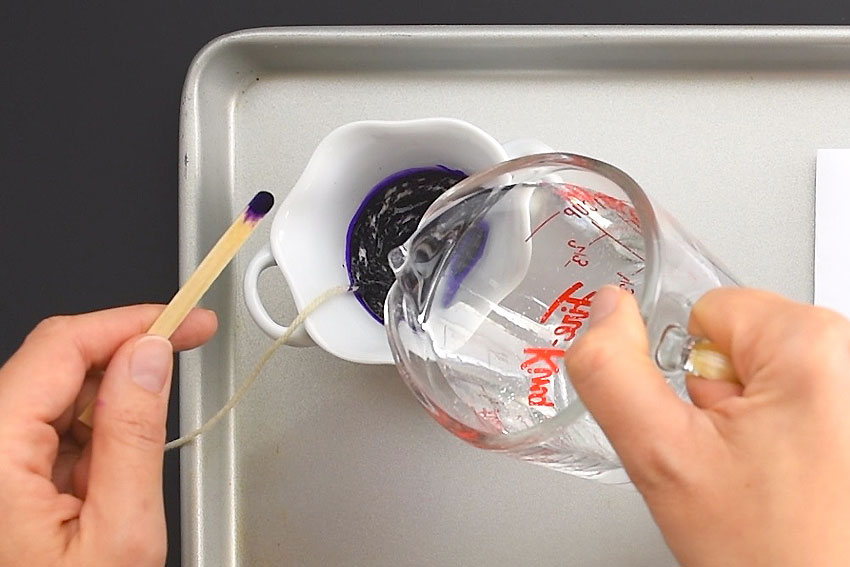
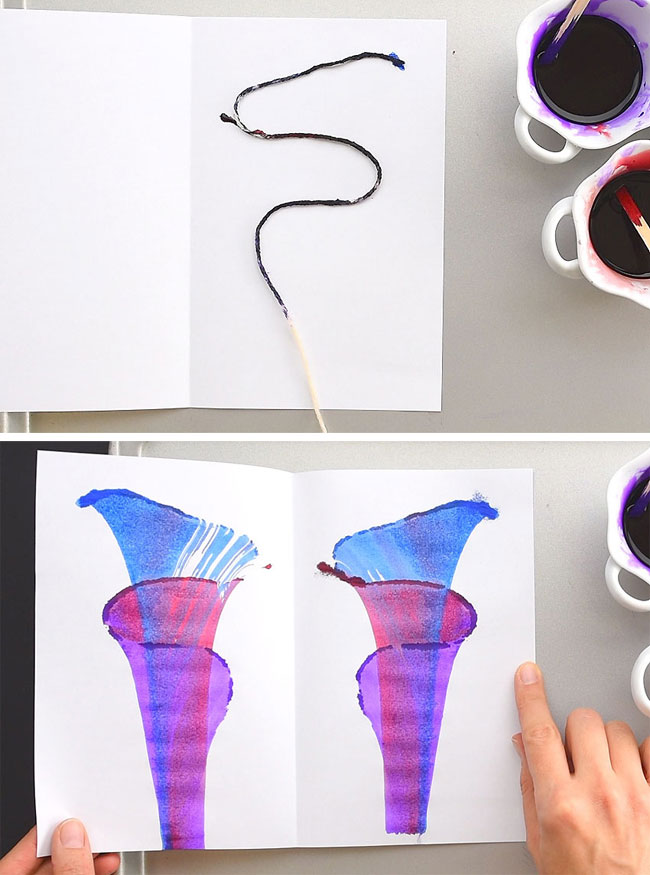
Place your piece of yarn into the bowl of watercolor paint, leaving about 4 inches of clean yarn outside the bowl so you can pick it up later. Use a fork or a popsicle stick to get the yarn completely saturated with the watercolor paint. We cut wooden coffee stir sticks (from the dollar store) in half and they worked perfectly for pushing the yarn around in the paint.
Feel free to water down the paint a little if you like. The more water you add, the less bright the colours will be in your artwork. The only colour we watered down was the purple because our purple is really dark and saturated.
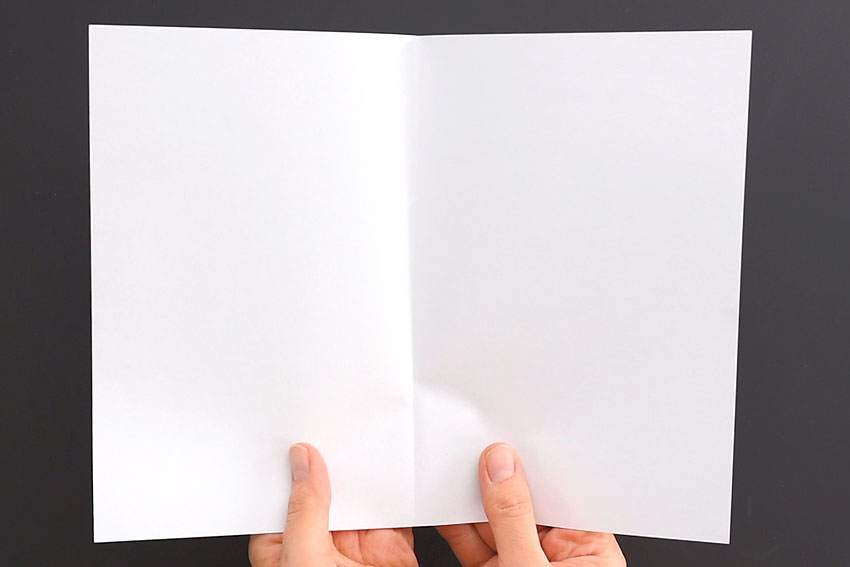
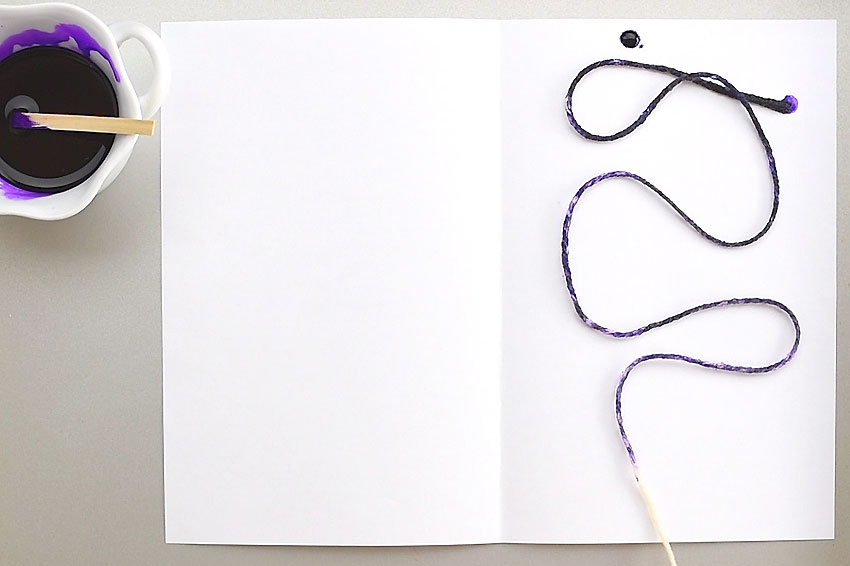
Fold a piece of regular printer paper in half like a book.
Place the String on the Paper
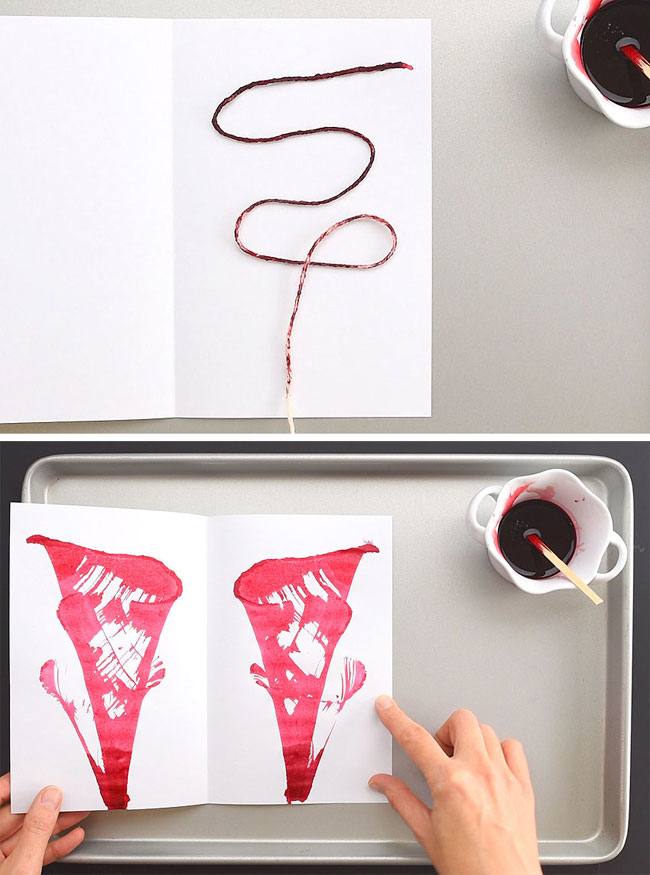
Pull the clean end of the string out of the liquid watercolour paint and lay it out on one half of the paper.
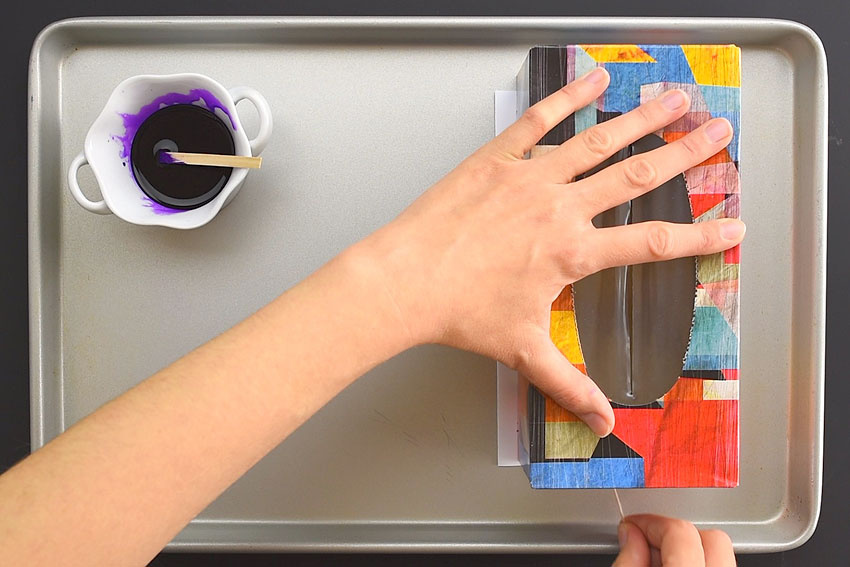
Fold the paper in half. Then place a small box such as a tissue box on top of the paper to hold everything down. Keep in mind that a little bit of paint will end up on the bottom of the box, so I recommend using something from the recycling bin.
Pull the String Out
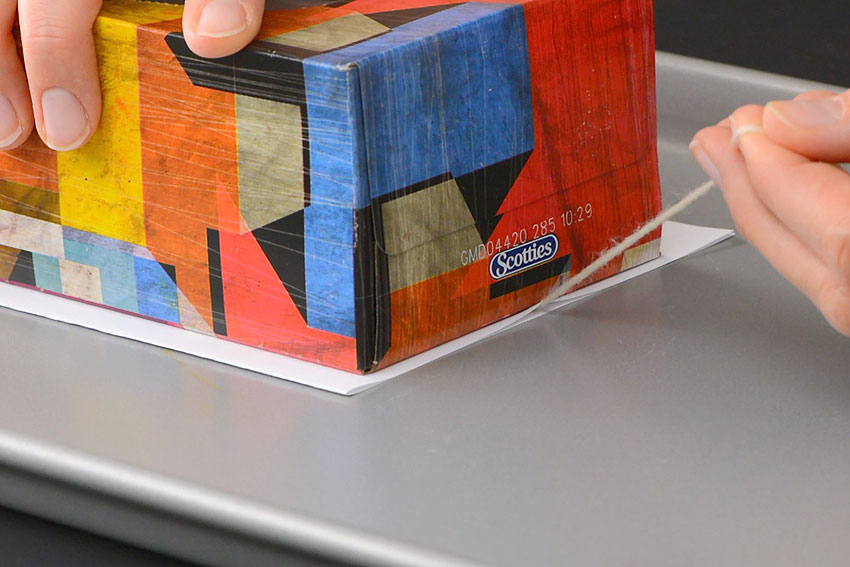
While pressing the top of the box down on the paper, slowly pull out the string. Make sure you pull it out as straight as you can keeping the string as close to the same position as possible. You only need to push down on the box gently. If you press it down really hard, it will be difficult to pull out the string. So if you notice the string isn’t moving very well, release some pressure from the box.
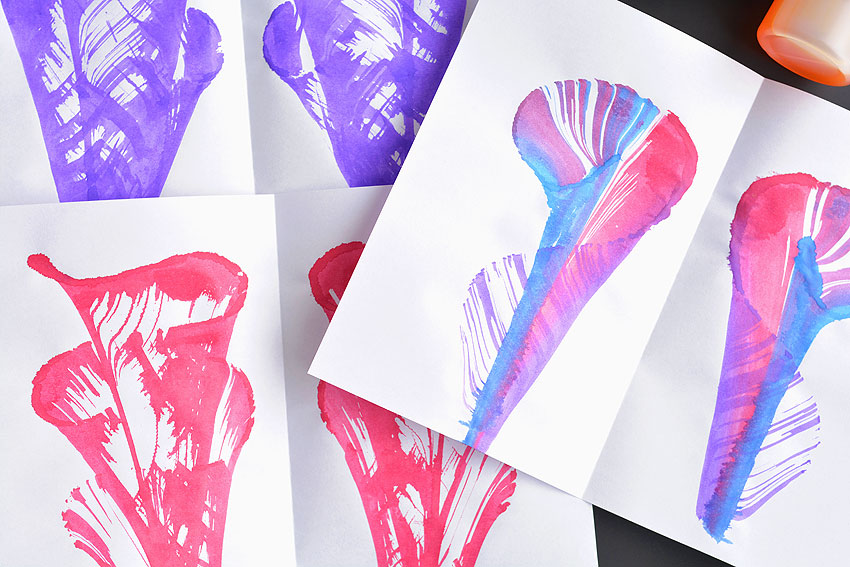
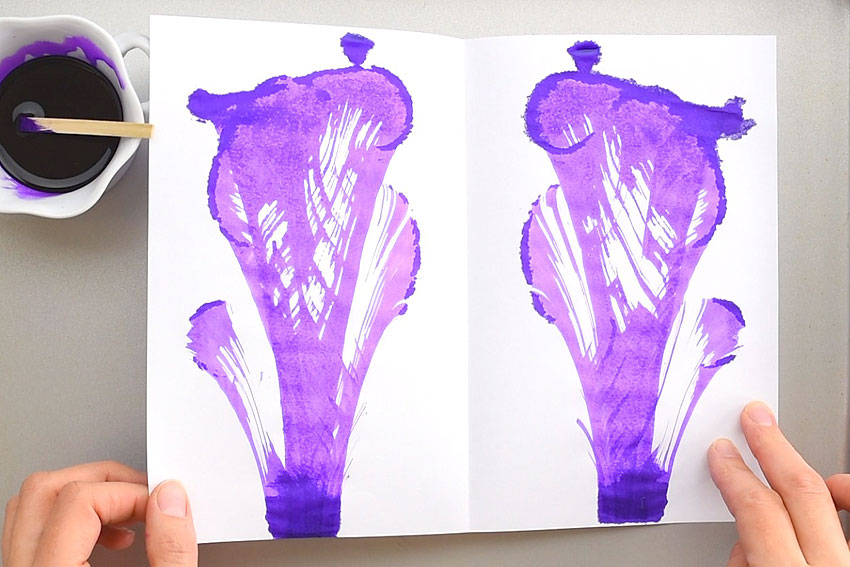
When you’ve pulled out the entire piece of string, you can open up your creation. You’ll have mirror images of your design on each side of the paper!
It’s really addictive! We tried all sorts of designs and patterns! The images below will show you how our various string layouts turned out.
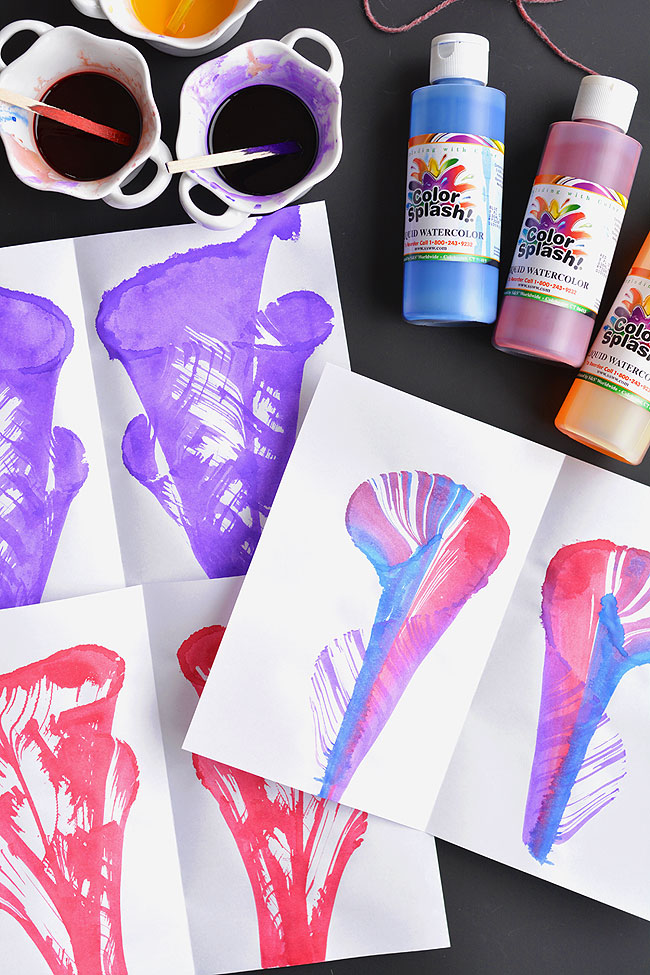
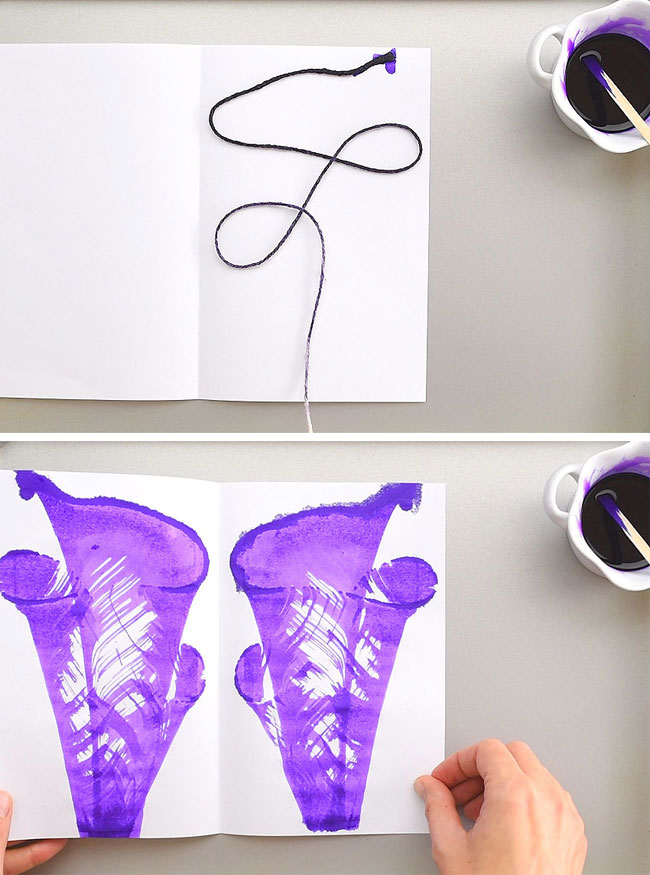
String painting with a single colour:
To make your string painting look more like flowers, cross the string over itself into a loop or two.
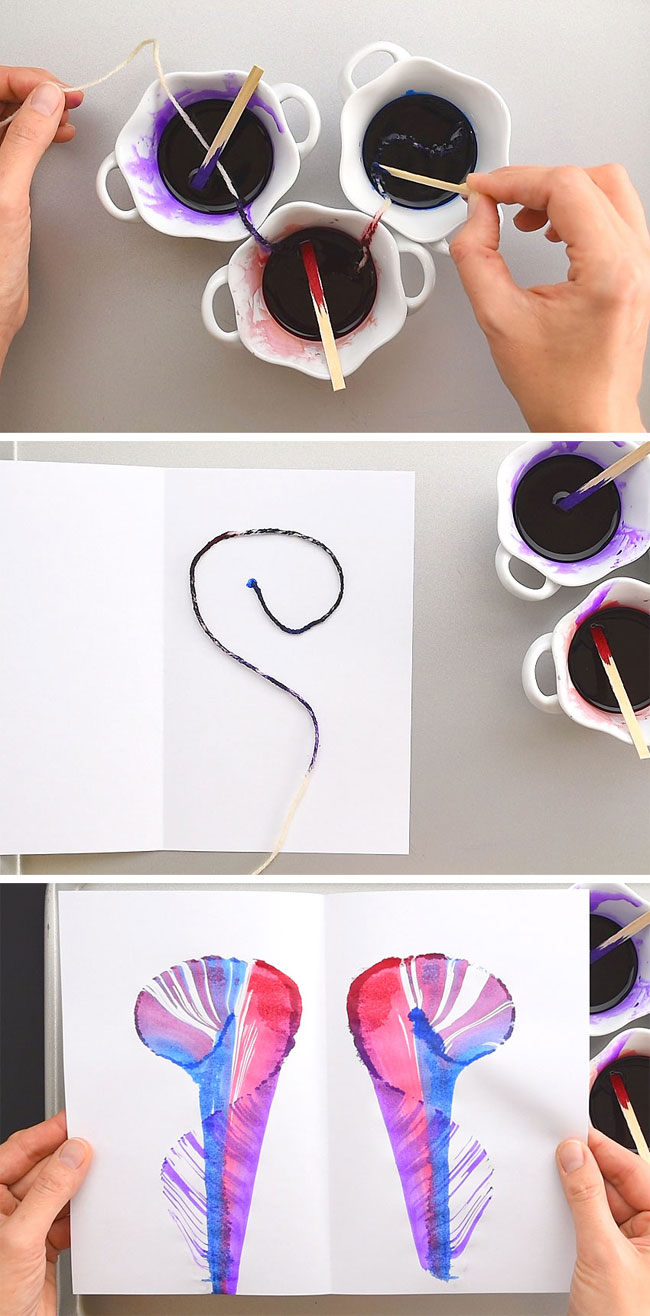
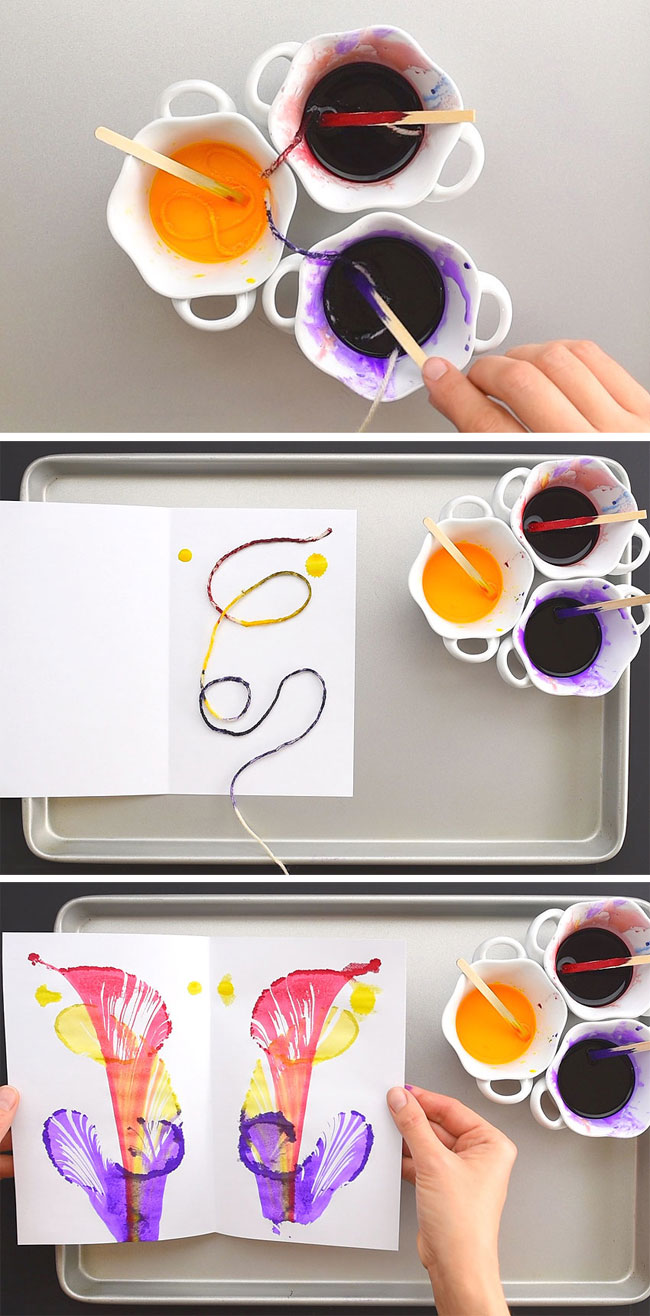
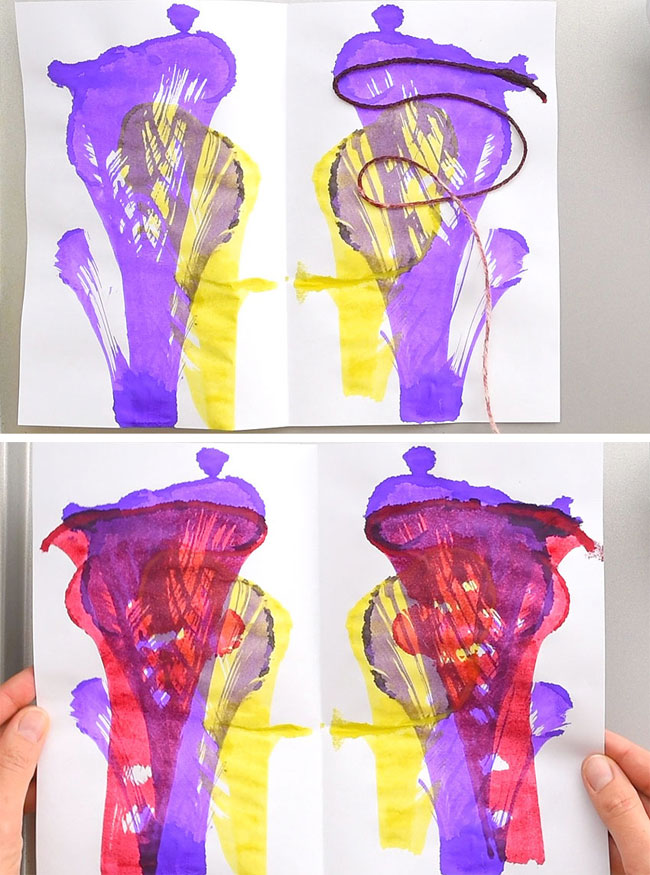
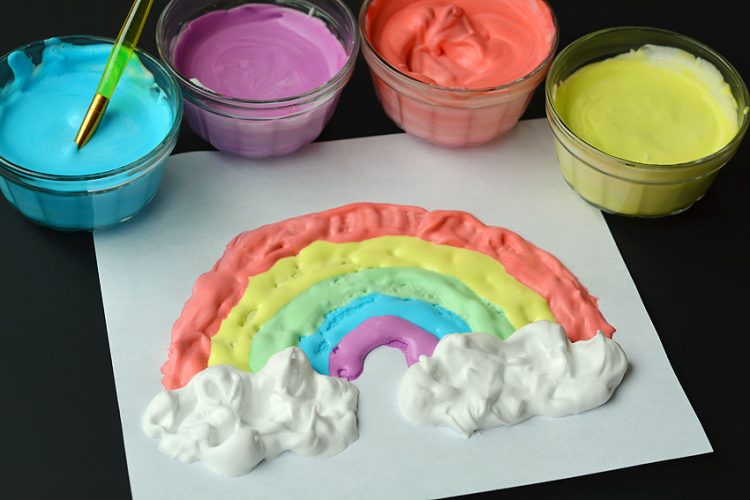
String painting with the string dipped in multiple colours:
This was my FAVOURITE method that made the prettiest paintings for us. Follow the same steps as above, but dip the same piece of yarn into 3 different colours. Use the stir sticks to pull the yarn into each colour. Make sure the yarn is completely covered without any gaps.
They turned out SO PRETTY!
FAIL! Here’s what DIDN’T WORK for us:
Don’t use the yarn or string more than once. When the yarn is super saturated, you don’t get those cool looking lines coming down from the string. Just a solid block of colour. Still pretty, so not a complete fail. See the photo below.
Here’s what they look like when you layer the colours:
FAIL! LOL I’m embarrassed to even show you this next one. I KNOW it’s possible to layer multiple string paintings on top of each other. But it just didn’t work for us. If you decide to layer different string designs onto your artwork here’s my tips so yours turn out better than mine:
String painting is such a cool and FUN way to make artwork. No artistic skill required! With simple supplies and zero experience you can make absolutely beautiful pieces of art! This kid-friendly technique is great for both adults and children.
Here’s even more simple and fun art projects for you to try out!
Paper Roll Fireworks Painting
String Pull Painting with Acrylic Paint
Magic Salt and Watercolor Snowflake Art
Northern Lights Chalk Art
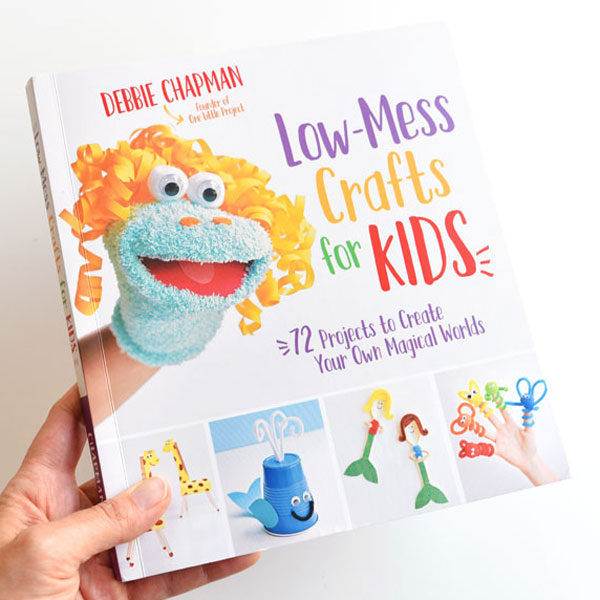
For more fun craft ideas, check out our book Low-Mess Crafts for Kids for 72 fun and simple craft ideas for kids! The projects are fun, easy and most importantly low-mess, so the clean up is simple!
Where to buy: