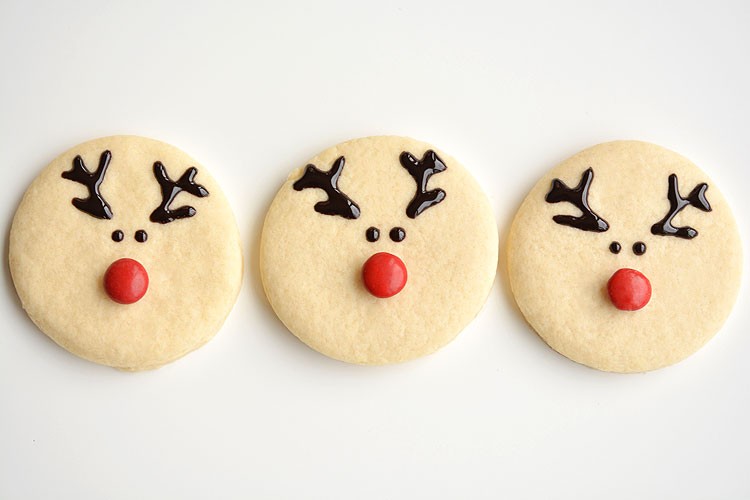
We have a small kitchen, so I keep all the leftover icing tubes from other treats we’ve made in a box upstairs in my office. So every day after school this week while I’m trying to squeeze in just 10 more minutes of work, my middle daughter has been bringing me a cookie, choosing a tube of icing from the box and asking me to decorate it for her. Yesterday she chose the bright red glitter gel icing that I used on the Chocolate Covered Strawberry Hearts way back when. That stuff is RED (and sparkly…). I iced a beautiful little snowflake on the cookie she brought me. She was so excited watching me decorate that cookie, and (just saying…) I was actually pretty impressed with my quick, free-handed icing skills too! When I was done, I handed the cookie back to her, and I said, “Now sweetie, this icing is really messy, so whatever you do, do NOT drop the cookie!”
And before I could even finish the sentence, her little fingers fumbled and she dropped her pretty little snowflake cookie just covered in wet gel icing on the floor. No no… Not face down. That little cookie rolled about 2 feet along the carpet leaving a straight line of bright red icing and THEN it landed face down on the carpet. My poor daughter stared at the cookie on the floor and just kept apologizing. She had the biggest look of disappointment on her face and her bottom lip was puffing out. She was so excited to eat her delicious snowflake cookie, and it was ruined. She looked like she was going to cry from the disappointment. And of course she was nervous to see how I’d react to the GIANT, bright red stain on the carpet… Normally I’d be angry, but how could I get mad when it was clearly an accident and she was already so sad!? sigh So for the moment, I’m stuck with a big red patch of carpet on the floor right next to my office chair! If you know how to get red gel icing stains out of carpet, please feel free to leave me some tips in the comments below!!
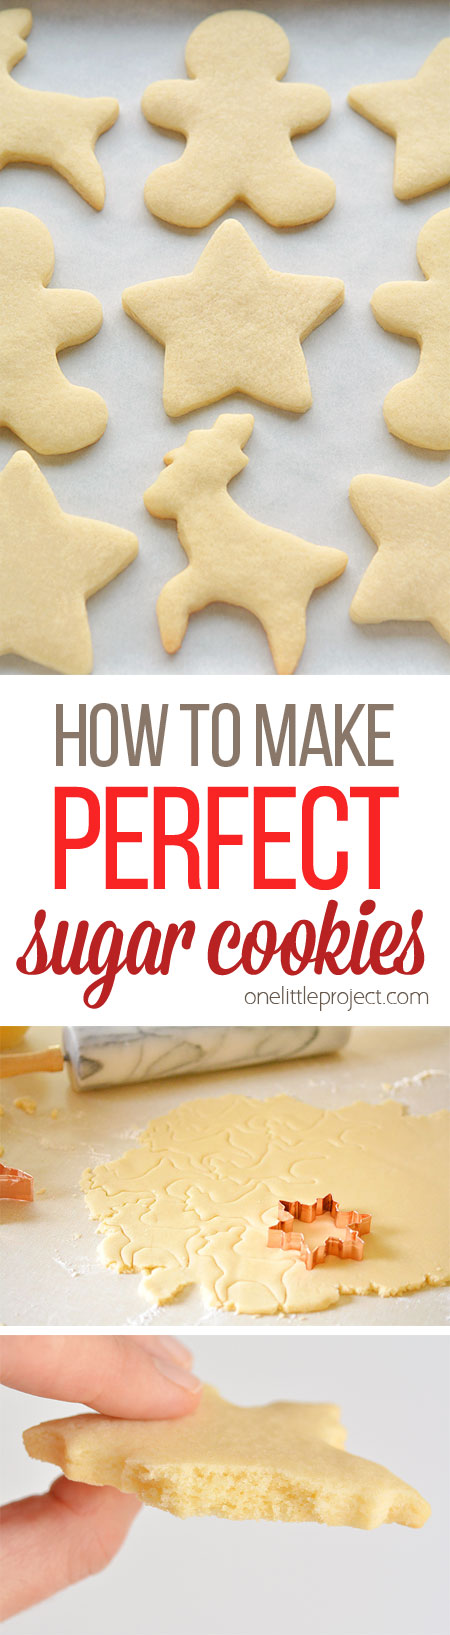
How to Make Perfect Sugar Cookies
When it comes to baking, I am definitely NOT an expert. So when I tell you that this recipe makes the best, most perfect sugar cookies, you can truly believe me. Because if I can make perfect sugar cookies with this recipe, I promise, you can make perfect sugar cookies too! You don’t need any special tools, and you definitely don’t need to chill the dough. I’m not going to claim to know why you need to chill the dough in some recipes (I’m sure there’s a reason for it in other recipes??), but I’m lazy. And when I’m baking with the kids, they just want to get those cookies in the oven! So I’d rather not take a giant pause in the middle of our kitchen fun.
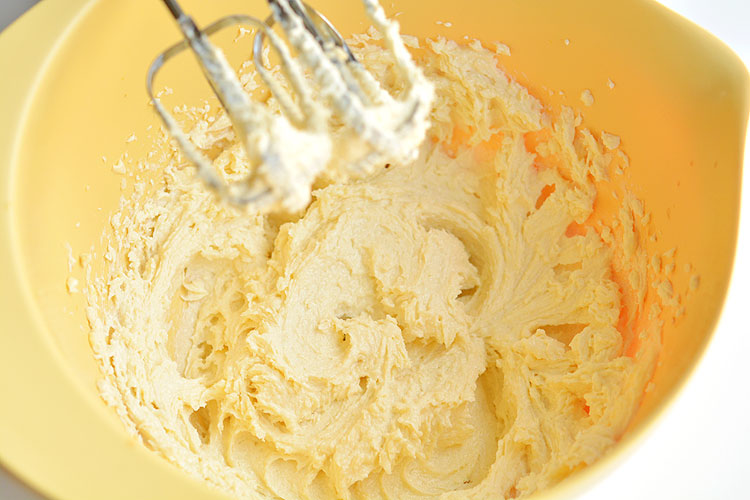
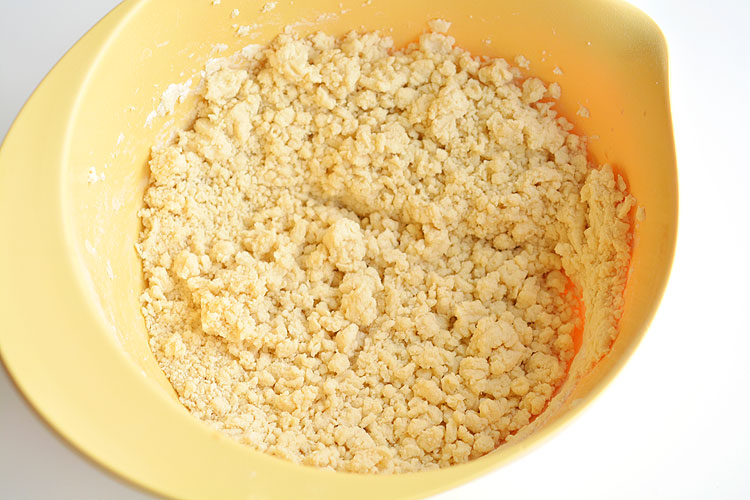
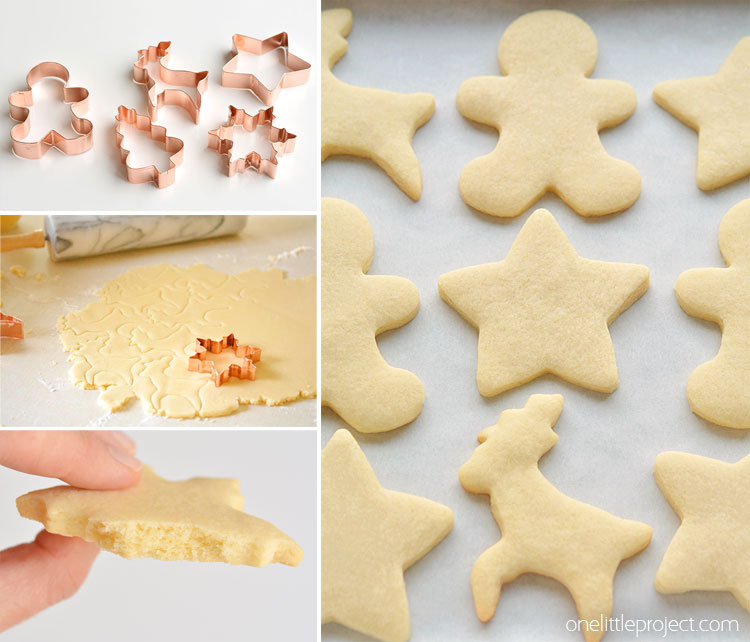
I used my hand held mixer to combine all the ingredients. When it gets to this clumpy stage where all the ingredients are mixed together, you’ll have to start using your hands to knead the dough.
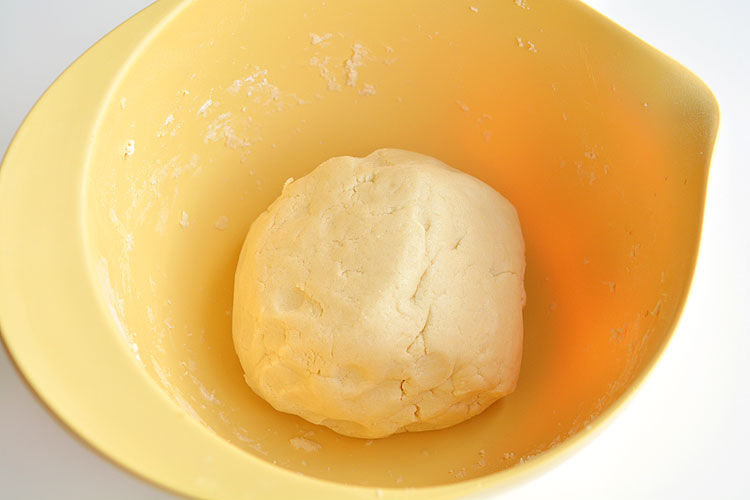
Knead the dough until it forms a consistent ball. It’s easier to roll the dough out in smaller batches, so at this point, you’ll want to split your big dough ball into 2 or 3 smaller balls. I recommend covering the bowl with plastic wrap to keep the dough from drying out while you’re rolling out each ball.
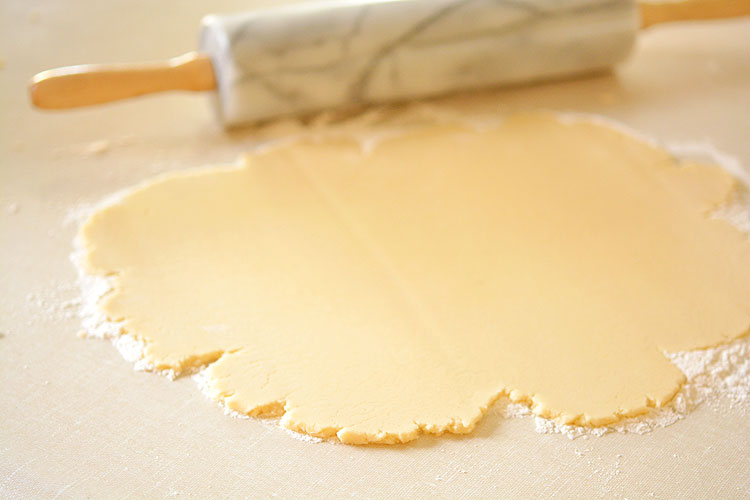
Take one of the balls and carefully roll it out onto a floured surface. I did mine right on the counter. Sprinkle a bit of flour on top of the dough as well to keep the rolling pin from sticking to the dough. Roll the dough by starting in the center and rolling out to the edges, changing the angle each time you roll until it has an even thickness throughout (about 1/4 inch thick). There are lots of tools available to make the rolling process easier, but I would much rather stick with a simple rolling pin. If it was good enough for my grandma, it’s good enough for me!
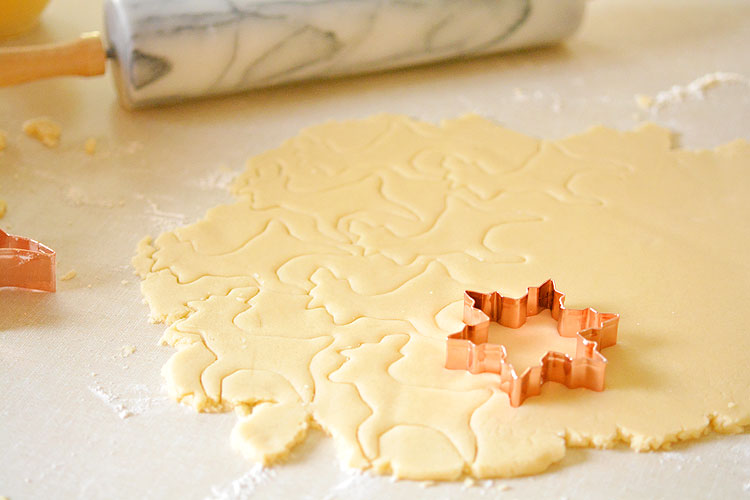
I don’t know why, but this is always my favourite part! Choose your favourite cookie cutters and cut out your shapes!
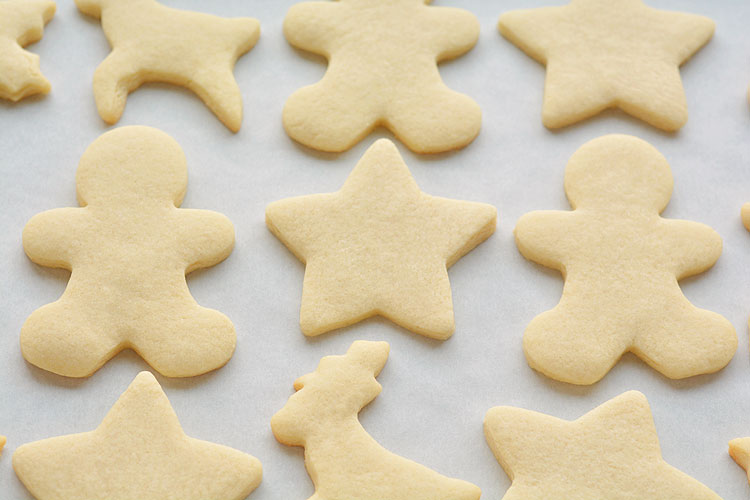
Lift them onto a parchment lined cookie sheet using a thin metal spatula.
The baking time will depend on your desired level of doneness. I baked the ones I made last year for 8 minutes but they looked kind of bleached (you can check them out here). The less time they bake, the softer their texture will be along with a lighter colour. For the super cute teddy bear cookies I made, I wanted them to be a little more golden, so I cooked them for 10 to 11 minutes. Cooking them longer gives them a firmer texture with golden edges. These particular cookies in this batch here I cooked for just over 9 minutes. Ovens will vary of course, so you’ll have to keep an eye on them near the end and take them out when they’re ready.
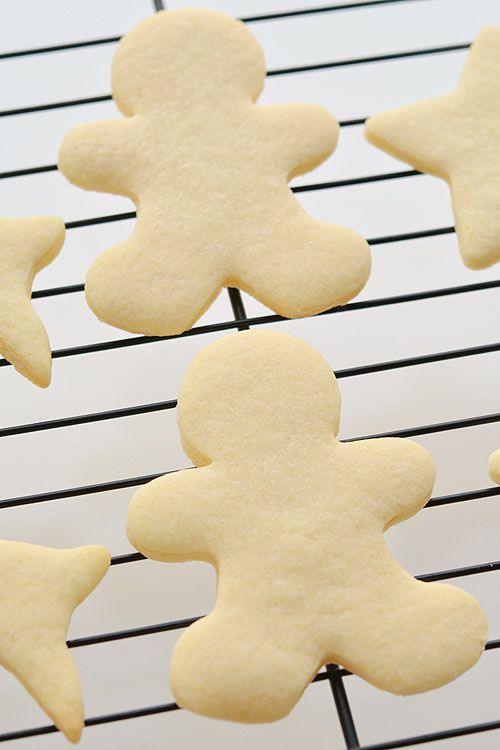
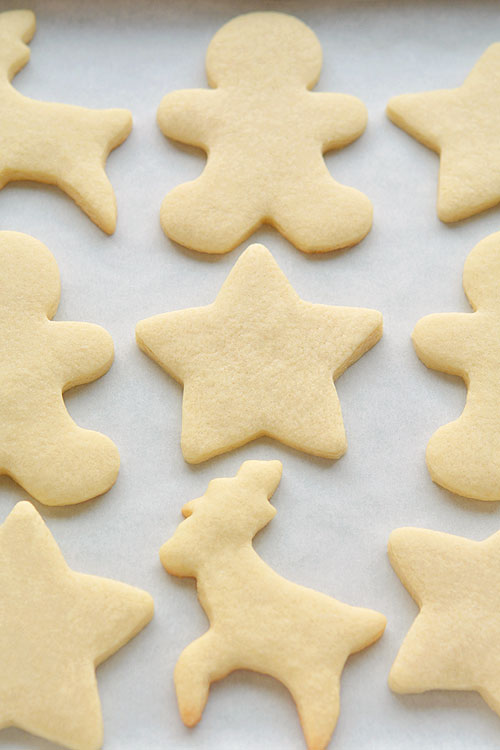
These cookies have wonderful, even edges, they have a lovely smooth surface, and they taste delicious both with and without icing!
They have a delicious slightly soft texture, not that super crunchy texture you get from store bought cookies.
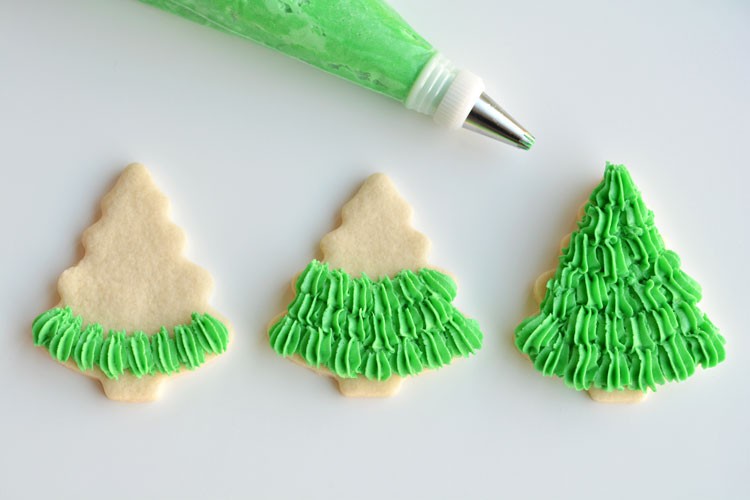
This is truly the only sugar cookie recipe you’ll ever need! They keep their shape, they have perfect edges every time and they taste AMAZING! My kids know I don’t bake a whole lot, so when they came home from school and saw these and LOVED them – and said they’d be perfect to leave out for Santa – I felt like I had accomplished something. 🙂 And just in case you need a recipe for sugar cookie icing, check out our gorgeous Sugar Cookie Christmas Tree Cookies. I LOVE that fir tree texture!!