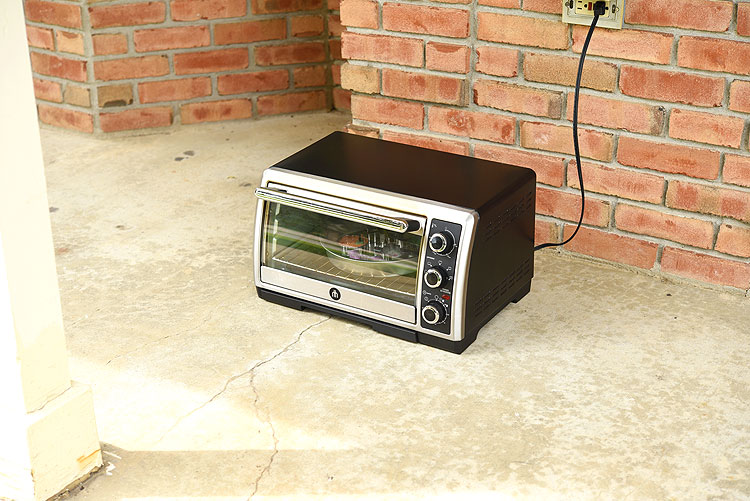
Just make sure you bake these outside – Whether it’s on your barbecue, or whether you take your toaster oven outside. Don’t bake them in the house. The plastic vapours that come out when the beads melt are really strong. And I’m not an expert, but I’m guessing the vapours aren’t overly safe to breathe, so I’ve always taken our old toaster oven outside onto our front porch so that there’s plenty of fresh air. I’ll be out on the front porch with my oven mitt in one hand and my camera in the other hand, squatting in front of the toaster oven, just watching in anticipation for 10 minutes. I’m sure it’s quite a sight for the neighbours!! haha
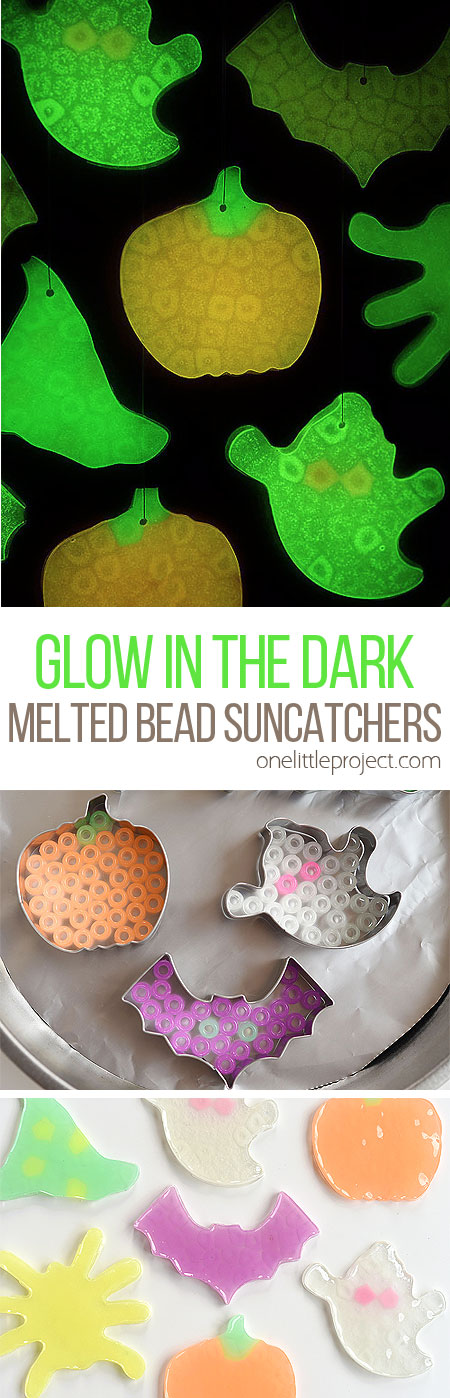
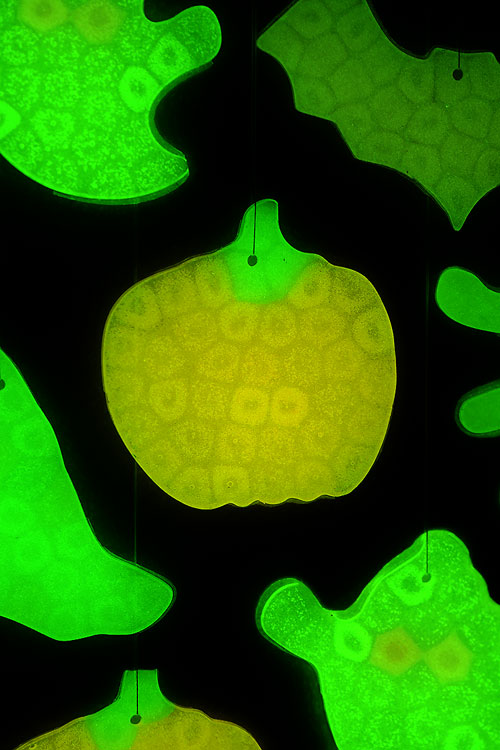
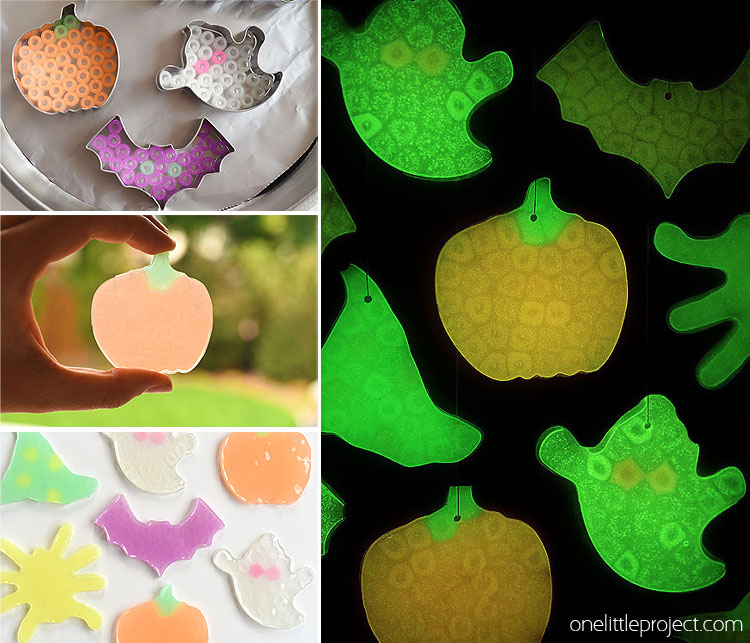
There’s something so relaxing about filling the cookie cutters with the beads! I love that the glow in the dark beads are translucent, rather than transparent, so when you hang them in the window they don’t disappear like the ones made with transparent beads. Charge them up with a flashlight (my husband likes to use the flashlight on his iPhone), then turn out the lights – all the lights – like all glow in the dark crafts, you need a really dark room to see them glow. They’re super cute and a great way to decorate for Halloween!
Glow in the Dark Melted Bead Suncatchers for Halloween
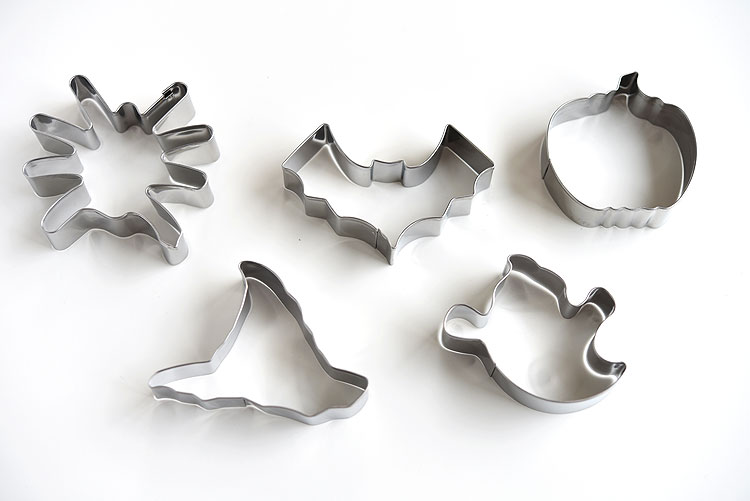
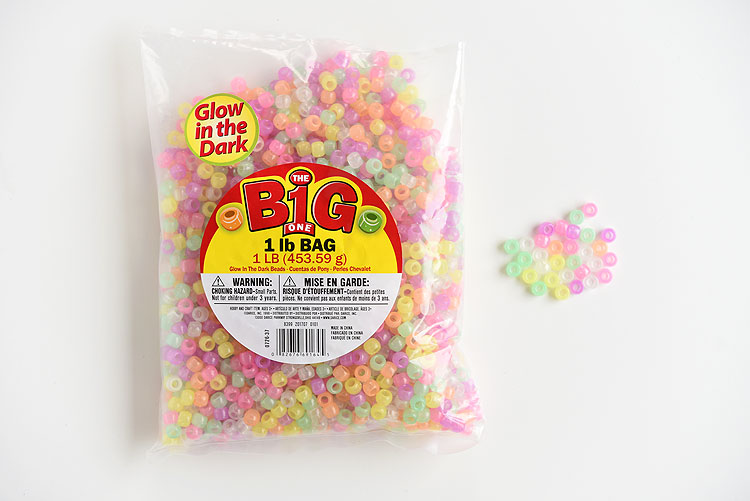
Glow in the Dark Pony Beads Metal Cookie Cutters White thread Foil Lined Pan Toaster Oven
Hopefully it goes without saying, but make sure you use metal cookie cutters for this craft. You don’t want your cookie cutters melting in the toaster oven when you melt the beads.
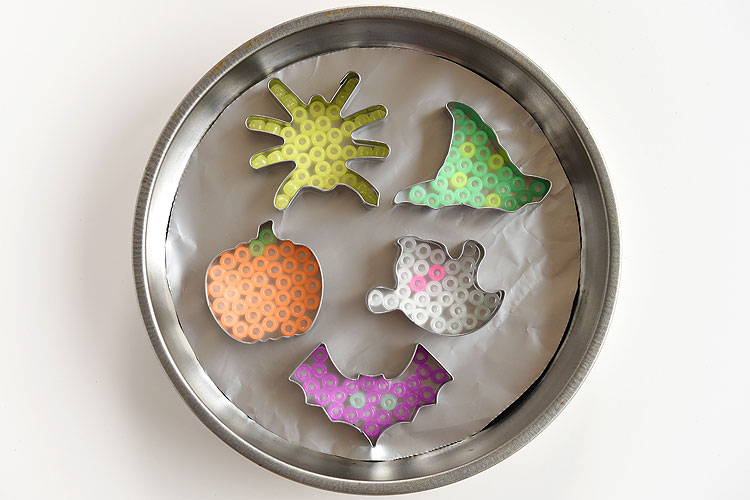
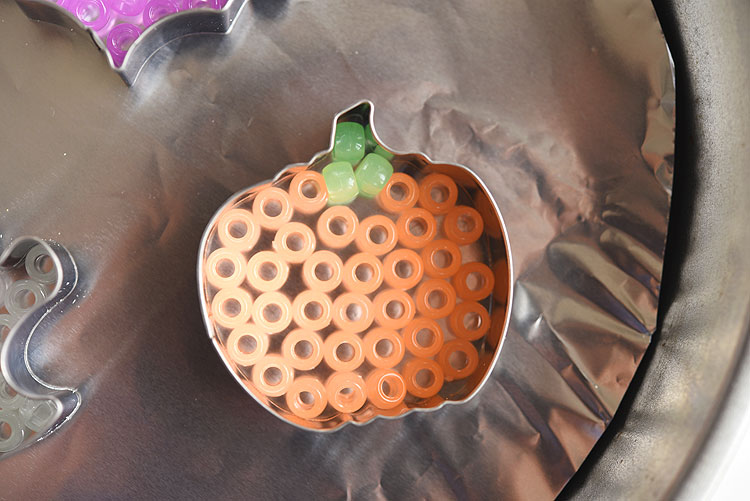
Line a pan with aluminum foil. I traced the bottom of my pan on the aluminum foil and cut it out so it fit exactly inside. You want the foil to be flat, otherwise whatever creases are in the foil will show up under your melted beads.
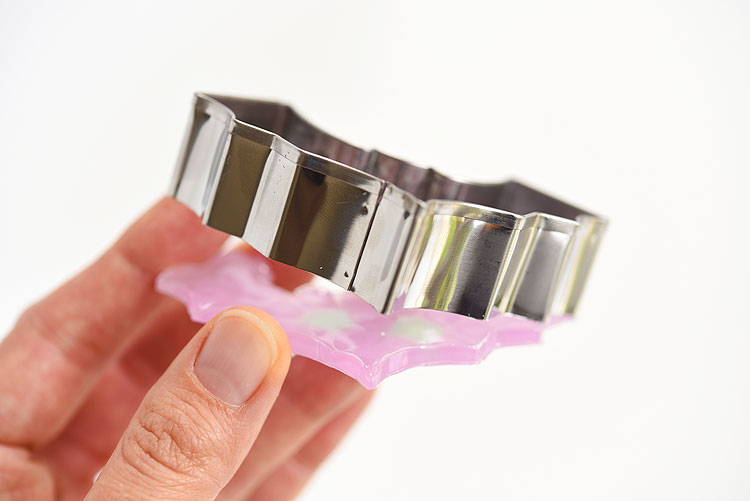
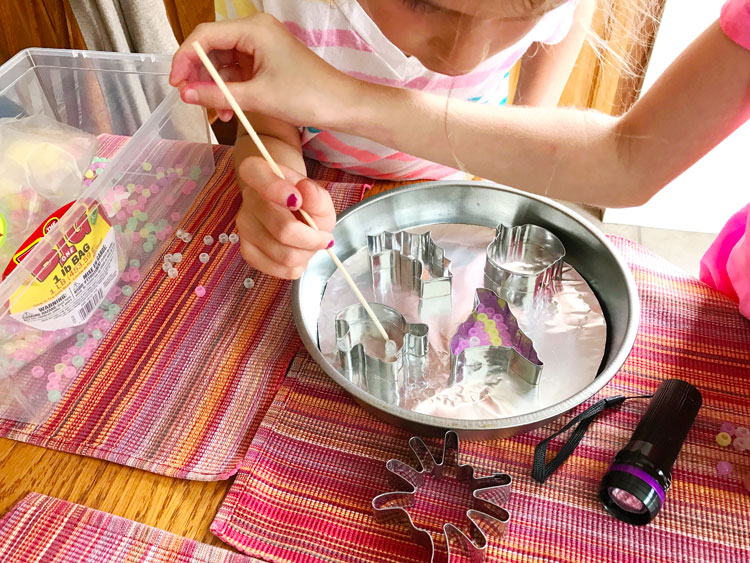
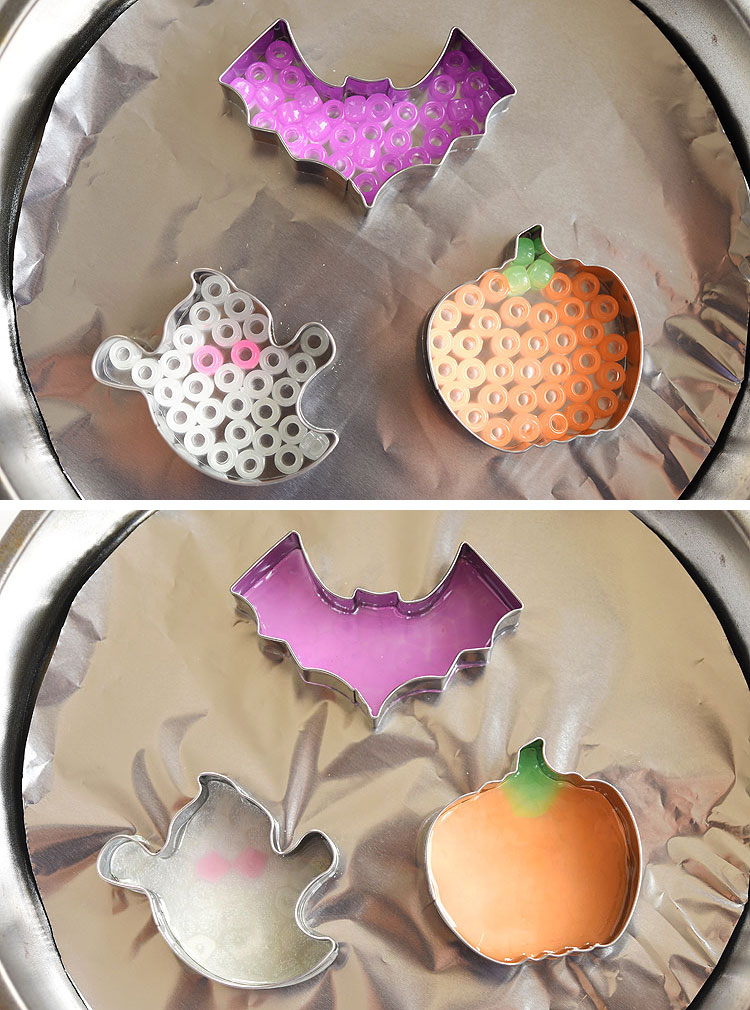
Add the beads into the cookie cutter, filling the cookie cutter up as much as you can. Don’t worry if some of the beads are sideways – when they melt they’ll flatten out. Use a toothpick or a wooden skewer to move the beads around inside the cookie cutter if you need to. Just make sure you only have one layer of beads (ie no beads on top of other beads), otherwise they won’t melt properly.
As I said above, I definitely recommend melting your beads outside. So here’s our toaster oven sitting on the front porch where there’s lots of fresh air.
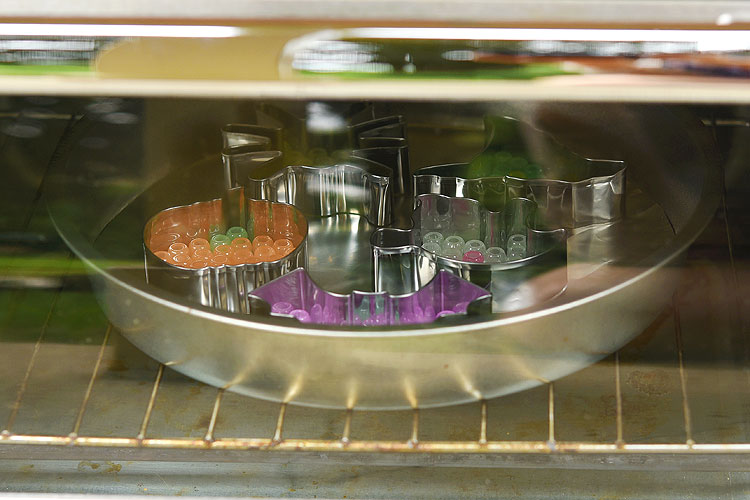
I set our toaster oven to bake at 450F using both the top and bottom elements. It took about 10 minutes for the beads to melt completely. When I made these in the winter, it took 11 minutes, so the time will depend on how hot or cold it is where you live. I didn’t bother preheating the toaster oven. I put the pan into the toaster oven when it was cold, then I turned it on with the beads inside to cook for 10 minutes total.
Bake the beads until they completely melt. It could take 8 to 15 minutes, depending on your oven. Remove them when they look melted and liquid like. Don’t bake it so long that the plastic starts to bubble or else you’ll ruin your cookie cutters.
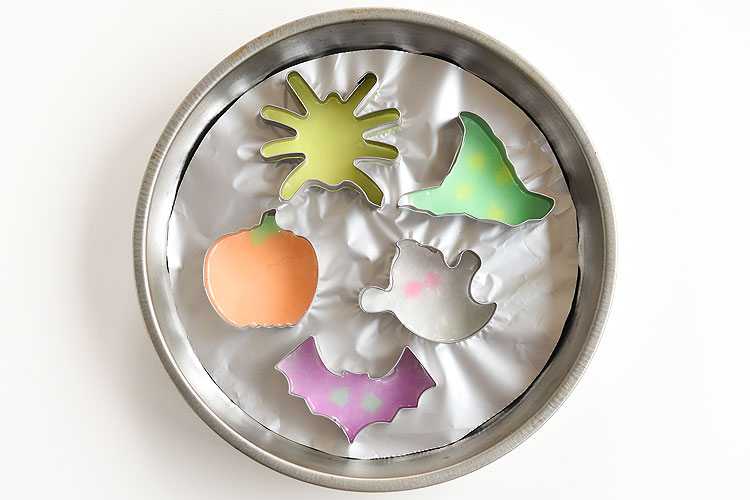
I let mine cool on the counter for about 15 to 20 minutes. When they are completely cool and hardened, gently pull the cookie cutter edges away from the shape and push them out of the cookie cutters. Maybe these cookie cutters weren’t as good quality as the copper ones I used when I made the melted bead ornaments at Christmas, because a little bit of plastic leaked out underneath the cookie cutters. Not a crazy amount or anything, it was just a little bit harder to remove them. I got all the shapes out of the cookie cutters without too much trouble and without breaking any of the shapes, so I was happy!
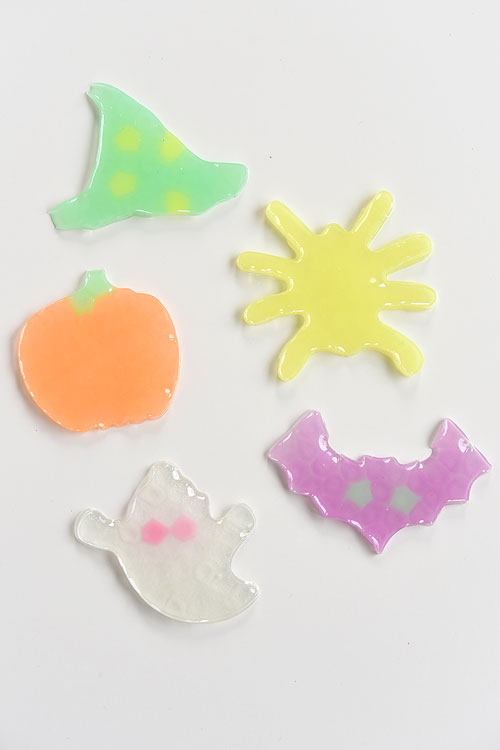
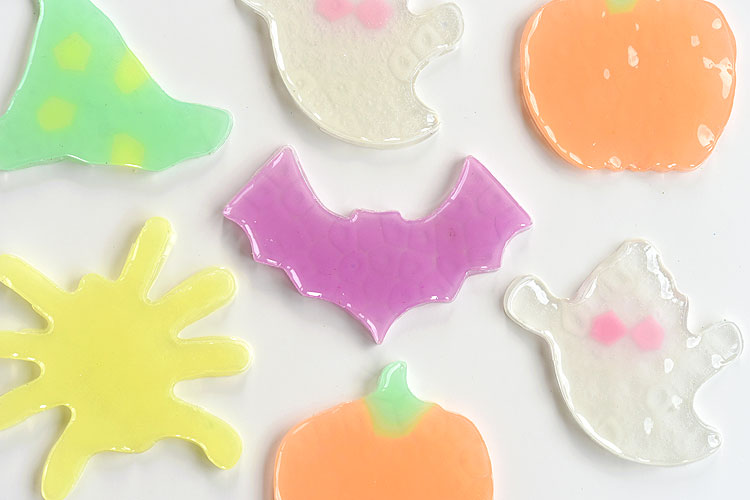
Aren’t they cute!? Even though the colours are sort of pastel, they still look awesome for Halloween!
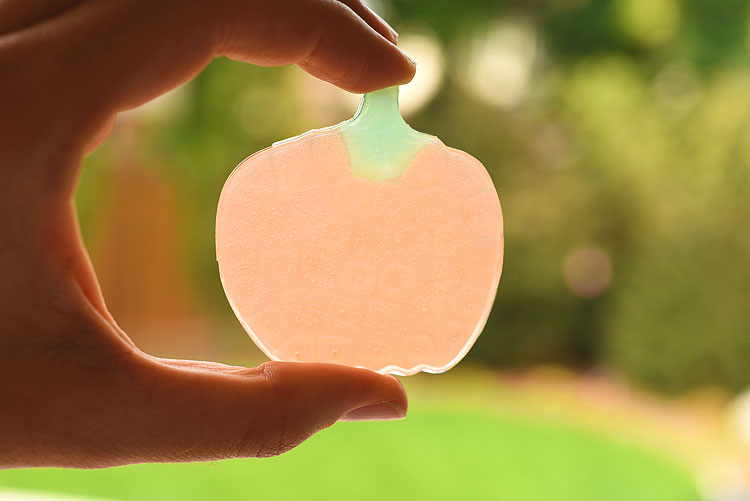
And when you hold them up to the window, the light shines through.
My 6 year old and 8 year old had lots of fun filling the cookie cutters with beads to make their shapes. They even had a flashlight out to make sure they glow in the dark.
Here’s another look at the before and after:
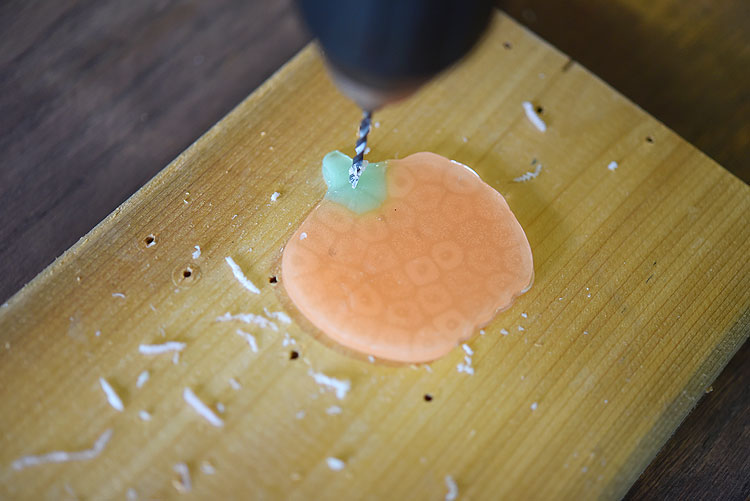
We wanted to hang ours in the window so I used a 1/8″ drill bit to drill a hole through each one and then I tied white thread through the hole to hang them from.
So here they are in the light:
And here they are in the dark. They definitely glow in the dark, but they are only this bright for about a second before they start getting dim. They are bright enough that you’ll be able to see them in the window at night, but only when all the lights are out and it’s completely dark. It definitely helps to charge them up with a bright light before you turn out the lights.
These glow in the dark melted bead suncatchers for Halloween are SO MUCH FUN! This is such a fun Halloween craft for kids! They are really simple to make and they look amazing hanging in the window, especially at night!
Here’s even more fun Halloween craft ideas:
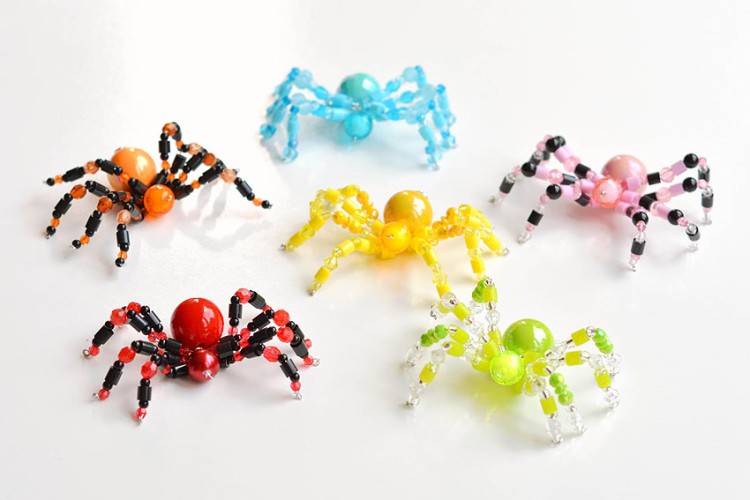
Beaded Spider Tutorial
Glow in the Dark Pumpkins
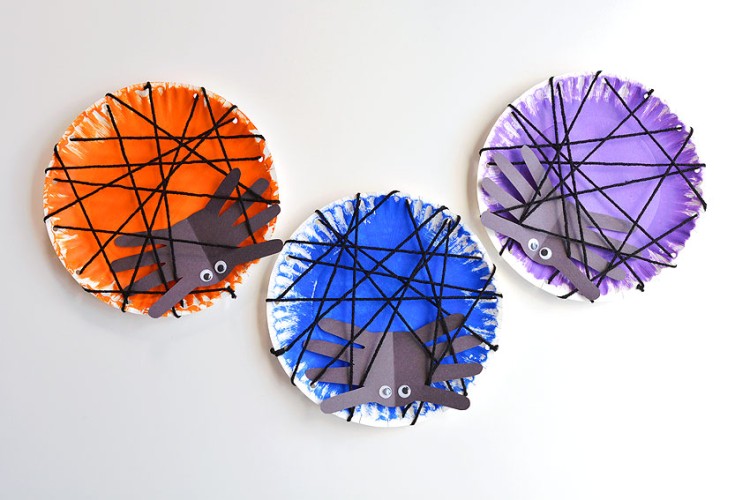
Handprint Spider Craft
Check out our new book Low-Mess Crafts for Kids for 72 fun and simple craft ideas for kids! The projects are fun, easy and most importantly low-mess, so the clean up is simple!
Where to buy: